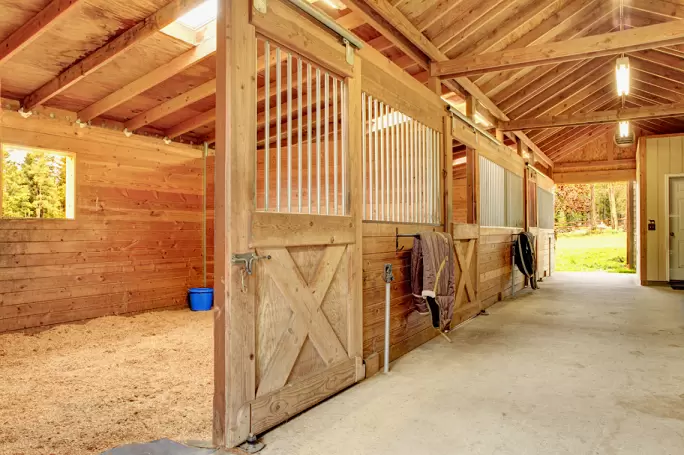
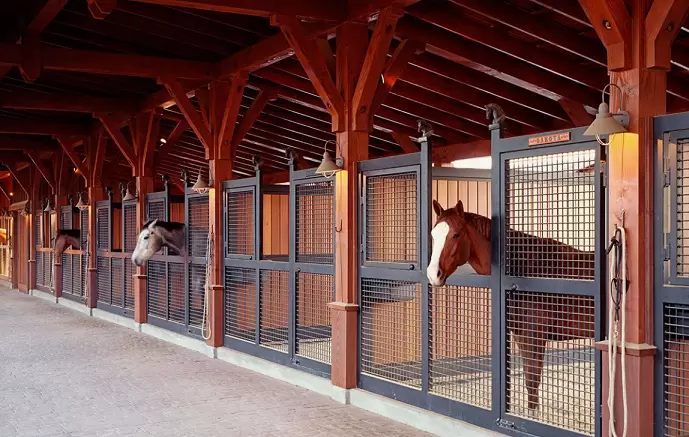
Whether you’re starting your first barn or upgrading decades old horse stalls, taking time to construct housing that meets your horses’ needs will pay dividends in their health, happiness and behavior for years to come. A well designed horse stall promotes natural movements while keeping troublesome habits to a minimum.
Consider Your Horses’ Unique Traits:
When planning dimensions, reflect on your horses’ breed, size, age, pasture mate preferences and whether they’re primarily used for work versus leisure. As a general guideline, allot at least 108 square feet or 12×12 feet per “average” horse. However, sizes can vary:
- Draft breeds like Clydesdales often stand 18 hands tall and weigh 2,000+ pounds, requiring more headroom and space for their largesse.
- Stallions may spar with one another through divider walls if housed too closely. Leave 4-6 feet between stalls housing intact males.
- Ponies less than 14 hands can feel cramped in standard stalls which can lead to undesirable chewing or pawing. Downsize stalls to 10×10 feet for pintos under 12 hands.
- Elderly or unfit horses prone to medical issues may need additional square footage so they can avoid injuring themselves if suddenly rising or falling.
Beyond sizing, think through fixtures to encourage your horse’s natural behaviors like resting with their rump towards the doorway while still permitting safe feeding and cleaning access. Position solid stall dividers and doors thoughtfully with line of sight and ventilation in mind.
Select Durable Building Materials:

With proper care and sealing, these materials will withstand damp bedding and variable temperatures without deteriorating:
Framing: Pressure treated 2x4s resist decay better than untreated lumber against the elements.
Walls: Exterior grade plywood panels provide strength and smooth surfaces easy to sanitize with low pressure hoses. As an alternative, rough cut vertical 1×6 boards create natural scratching posts.
Doors: Construct a 36×72 inch door using exterior grade 3/4″ plywood or vertical boards reinforced with 45-degree gusset bracing on the inside for rigidity. opt for smooth surfaces horses can’t catch their hooves in. Consider adding an anti kicker plate if needed.
Flooring: Housekeeping experts debate the pros and cons of concrete, rubber mats or deep bedding options like shavings or straw. While concrete holds up indefinitely and simplifies manure removal, softer surfaces are gentler on delicate hooves.
Roofing: Standing seam metal, corrugated roofing or modified Bitumen coverings protect against sun, rain and airborne pollutants while lasting 15-25 years before needing replacement. Insulate between rafters in colder climates.
Always select non toxic, food safe materials for surfaces your horses might contact like framing, trim, nails and screws. Invest in specialty hardware designed for equine housing.
Laying the Groundwork:
Once you’ve chosen premium supplies appropriate for your site conditions and equestrian program, it’s time to construct the framework. Here are detailed steps:
- Dig 12-inch deep trenches along stall perimeters and lay a 4-inch thick compacted gravel base for structural support and drainage.
- Erect 6×6 pressure treated posts sunk 2 feet into the ground at 8-foot intervals. Place lag bolts through metal post bases to secure them in place.
- Along the top and bottom of the posts, fasten 2×6 or 2×8 top and bottom plates using 16d galvanized nails or lag screws every 16 inches.
- Mark wall stud layouts at 16, 24 or 32 inch centers depending on your local building code requirements. Cut 2x4s to fit and nail into place using 10d galvanized nails.
- Add diagonal 2×4 bracing inside the stud cavities to further strengthen corners under pressure (Fig. 1).
- Once framing is square, you’re ready to proceed onto the next step of enclosing your horse stalls!
Walling and Doors for Horse Stall:

Begin adding exterior plywood or vertical board sheathing starting at the bottom plate and working upwards. Nail panels every 4-8 inches with appropriate fasteners. Choose smooth, sealed surfaces for horses’ safety and sanitation. Then, construct and install stall doors:
- Cut doors to measurements leaving 1⁄4 inch clearance all around.
- Attach vertical 1×4 or metal Z-guides top and bottom using screws.
- Hang using full length industrial hinges secured with long lag bolts every 12 inches.
- Brace doors further by running diagonal support gussets inside from hinge to latch point.
- Reinforce edges and corners with stall guard board edging till smooth.
- Finish doors with a surface mounted slide bolt or clasping upper shackle bolt for security. Test swings freely yet stays shut.
Other walling considerations include privacy slats 4-6 inches above floor level to define boundaries. Install “Dutch” half doors for extra airflow if desired.
Laying the Perfect Flooring:
Flooring choices each have advantages and drawbacks to consider based on use, maintenance frequency and your horses’ individual needs. Let’s examine popular options in more detail:
Concrete: Poured or pre poured slabs will never rot, burn or degrade with horse traffic. However, it can impact joints over time as a solid surface. Covering with stall mats provides cushioning. Advantages are its smooth, easily sanitized qualities.
Rubber Mats – Interlocking or large square mats spaced minimally create a resilient yet affordable surface. They drain well while protecting hooves. Downsides are labor needed to move mats for deep cleaning and potential buckling with age.
Deep Bedding – Using 6+ inches of shavings, straw or peanut hulls mimics a natural ground feel. It provides insulation, absorbs moisture and cushions falls. Cons are the weekly work scooping manure and replacing soiled bedding to control odors and pests.
Mixed Surfaces – Some barns pour concrete aisles but bed stalls deeply, or use mats in high-traffic areas with 6+ inches of bedding in corners for relaxation. Find a hybrid approach matching your housekeeping philosophy and chore workload.
So in summary – fit the flooring to your horses, climate, construction of stall and level of daily stall maintenance desired. With any surface, add slope away from the animals towards a centered drainage pipe running outside.
Completing the Structure:

Enclose the horse stall ceiling for security above and install a properly sloped roof for long-lasting protection. Detail steps:
- Rip 3/4″ CDX plywood or boards into 4×8 panels for overhead coverage and nail into place.
- Erect rafters spaced 2-3 feet apart by toe-nailing 2×6 or 2×8 members to ceiling plates and bearing walls below.
- Lay 1×4 or 1×6 skip sheathing across rafter tops, then reinforce with diagonal bracing.
- Cover with flexible underlayment like 15# felt paper, followed by metal roofing panels secured with neoprene-capped nails.
- Finish eaves by adding ventilation soffits or fascia as accents.
Frequently Asked Questions (FAQs):
Q: What is the cheapest way to build a horse stall?
A: Shed row barns is the cheapest way to build a horse stall.
Q: How do you build horse stalls?
A: Grills, stall doors, lumber and lighting.
Q: What makes a good horse stall?
A: A 12-foot by 12-foot stall is the standard recommendation for a 1,000-pound horse.
Q: What is needed in a horse stall?
A: Stall mats, stall guards, stall gates, stall signs, and hardware.
Q: Can a horse stall have a concrete floor?
A: If your facility already has a concrete slab, you’re in luck.
Conclusion:
This in-depth guide on building horse stalls, I hope I’ve provided all the necessary information and inspiration for you to construct exemplary living spaces for your equine companions. Whether you need housing for one horse or an entire stable, following best practices for dimensions, materials and workmanship will result in structures suited to keep horses healthy, active and stress-free.
With the tips covered here, your horse stalls can stand proudly for years while deepening the bond between you and your four-legged friends. Their comfort and safety should always be the top priority, so enjoy the process of crafting their perfect home!

Freya Lily has been a passionate blog writer since 2010, crafting content that captivates and informs her readers across a variety of topics. With over a decade of experience, Freya has honed her skills in delivering insightful and engaging narratives that resonate with her audience. Her dedication to quality writing and her ability to adapt to evolving trends have established her as a notable voice in the blogging community, where her work continues to inspire and engage readers.